

Digital photographs have become a key part of the scientist’s observational toolkit. In a forensic context photographs provide a vital source of evidence. Taking accurate digital measurements is an important skill.
“I have never used Photoshop, how can I get a good grade?”
“Can’t I just measure from the photo?””
“It’s beyond my comfort zone!”
“What happens if I did not include a scale bar?”
The study skills unit is about learning new skills about stretching your horizons and above all else investing time in your own professional development. This is one of those skills or pieces of ‘know-how’ that is worth investing.
So invest the time to learn something new; it won’t be easy but it will make you a better professional given practice. As with any task there are many different ways of approaching a task and one is not necessarily better than another.
Simple measurements
Open Photoshop and navigate to the photograph that you want to take measurements from. The photograph must not be oblique; that is the line from the camera lens to the object (and surface its rests on) must be orthogonal (at right angles). Compare Figures 1 and 2 one is good for taking measurements and one is not. We now need to make sure the Rulers are visible in the window; go to View >> Rulers to turn them on. By right clicking on the ruler you can change the units of measurements (Fig. 3). Initially we want pixels so select this. Now we need the measurement tool which looks like a cartoon version of a ruler and is hidden with a range of other tools including the eye dropper on the left hand pallet. Any of the buttons on the left hand pallet that has a small triangle in the bottom corner has more than one tool hidden there; click and hold on the upper most icon and a pull out menu will appear allowing you to find the tool you want (Fig. 1). If you use it a lot you can custom the tool bars.
 Figure 1: Image ready for measurement. Note that it is orthogonal to the camera. The scale bar is square in the picture. Compare to Figure 2.
 Figure 2: The same object in Figure 2 but from an oblique angle. In this case any measurements made would not be true distances.
Using the measurement tool measure accurately the distance on your scale bar between two point. For example the distance between 0 and 15 cm which is the length of the scale bar (Fig. 4). The number of pixels this corresponds to will appear in the top tool bar, circled in red in Figure 4. Remember we set the units to pixels by right clicking on the rulers (Fig. 3).

Figure 3: Changing the units by right clicking on the ruler.

Figure 4: Measuring the length of the scale bar in pixels
In my case the distance is 2596 pixels, so if we divide this by 15 we get the number of pixels per centimetres which is 173.06. Write this number down. Now we can give this information to Photoshop so that it is correctly calibrated for this photograph. Go to Image >> Image Size (Fig. 5). Now adjust the drop down so that it shows pixels/centimetre and write in the figure of 173.06. Uncheck the resample and constrain check boxes (Fig. 5) and press OK.
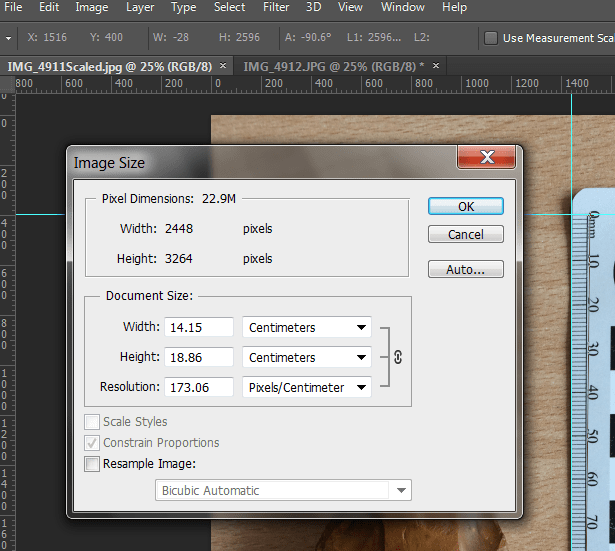
Figure 5: Calibrating the image for measurements.
The image is now correctly calibrated. If we wanted to permanently set the image to 1:1 then we could leave the ‘Resample Image’ checked and it would re-sample and adjust the image permanently. If you wanted to print the image at 1:1 then this is what you would do. However in our case we don’t want to unnecessarily and perhaps detrimentally adjust the image resolution so leave it unchecked. If you now go back to the rulers and right click you can change the units back to something useful like millimetres or centimetres. So next we much check the accuracy of our calibration. There are two ways of doing this. Firstly if you measure between 0 and 15 cm on the scale bar the figure of 15 cm should appear in the measurement value (Fig. 6). Secondly, you can drag two guides to one corner of your scale bar and then drag the origin of the ruler to that point. You do this by left clicking on the origin (point where the vertical and horizontal rulers meet). The measurements on the rulers should now correspond to those of the scale bar. You can now proceed to take as many measurements as you wish (Fig. 6). If the calibration is not quite right then you need to repeat the steps above. You have calibrated your first photograph for measurement; congratulations!
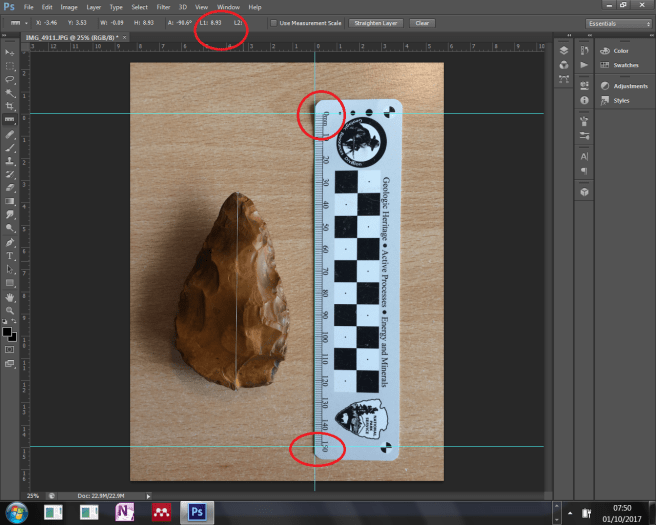 Figure 6: Calibration checks assuming the checks are good you are now ready to measure your artefact.
You can also measure angles. Use the measuring tool in the normal way but then depress and hold down the Alt key when you have drawn the line this will allow you drag out a new line. The angle between the two lines is recorded in the toolbar (Fig. 7).
 Figure 7 Measuring angles in Photoshop. Drag a measurement line 1-2 then depress and hold the Alt key down to drag out a third line 3. The angle between the two lines is shown in the main toolbar.
Multiple measurements
If you have multiple measurements to make on a single image there is a facility in Photoshop to create a measurement log and to export this as a Text-file. This can be very useful. Go to Windows >> Measurement Log a horizontal window will appear along the bottom of the screen. You now need to set the measurement scale (Fig. 8). Essentially you are being asked to add in the same information as before; how many pixels equals your unit of measurement (Fig. 9). You can now continue to makes a series of measurements; after each one you need to press ‘record measurement’. Once you have completed your measurements you can export the log by clicking on the ruler icon with an arrow embedded. This is located in the top right hand side of the measurement log window (Fig. 10). It is important to realise that the system only records the measurements so you need to keep a written note or sketch in your notebook of what each measurement corresponds to. Files are exported as Text-files.
 Figure 8: Measurement log. Click the stack of lines on the right hand edge of the upper part of the window to bring up the ‘Set Measurement Scale’. Select Custom to bring up the dialogue box in Figure 9.
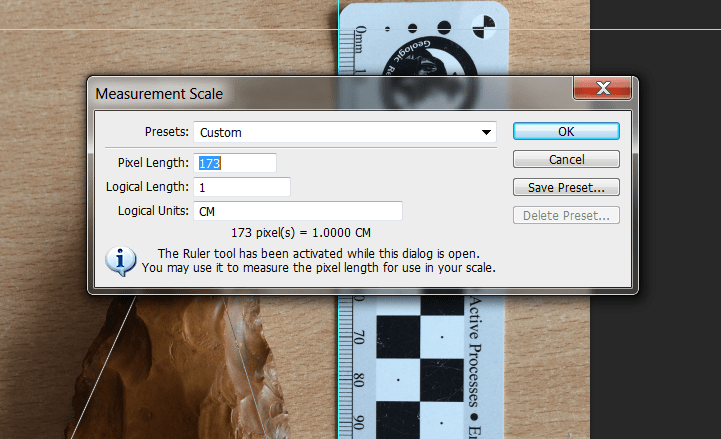 Figure 9: Setting the measurement scale. You need to type in the number of pixels that corresponds to a cm.
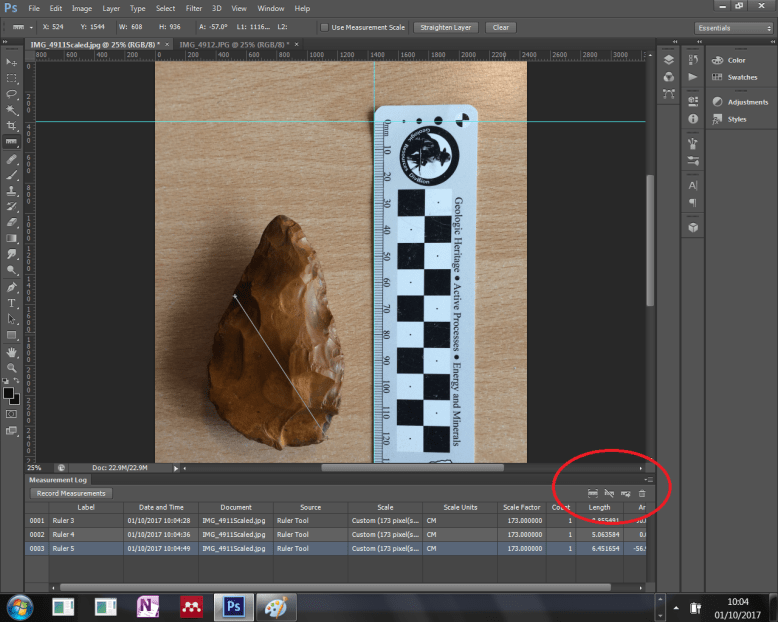 Figure 10: Measurement log in action. You will find the export function circled.
Correcting oblique images
If you did not take your images orthogonal to the plane then it is not ideal. Sometimes this can be difficult to achieve such as in the case of buildings, where they will always appear foreshortened unless you can get far enough away from them. There are several ways of correcting for this within Photoshop and some excellent perspective tools. The way I am going to show here is just one solution that I find useful provided that there is a square object in the frame.
My preferred solution is to use the Perspective Crop tool. You will find this hiding below the crop button; it looks like a mesh (Fig.11). Use this tool to draw out a grid approximately near the square object (Fig. 12). Now take the corners and place them on the corners of the scale bar. Having done this place the cursor on the side walls of the grid and pull them out to extend it in all dimensions over the key parts of the image (Fig. 13). Now clip crop. The plane is corrected and you can proceed to make measurements as before (Fig. 14). It is not ideal and there are several opportunities for error so avoid using this if possible.
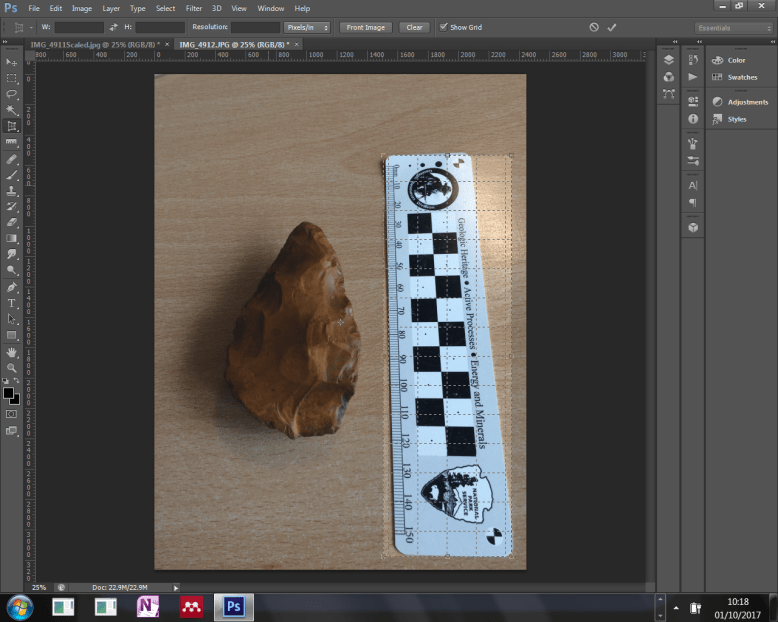 Figure 11: Deploying the perspective crop tool.
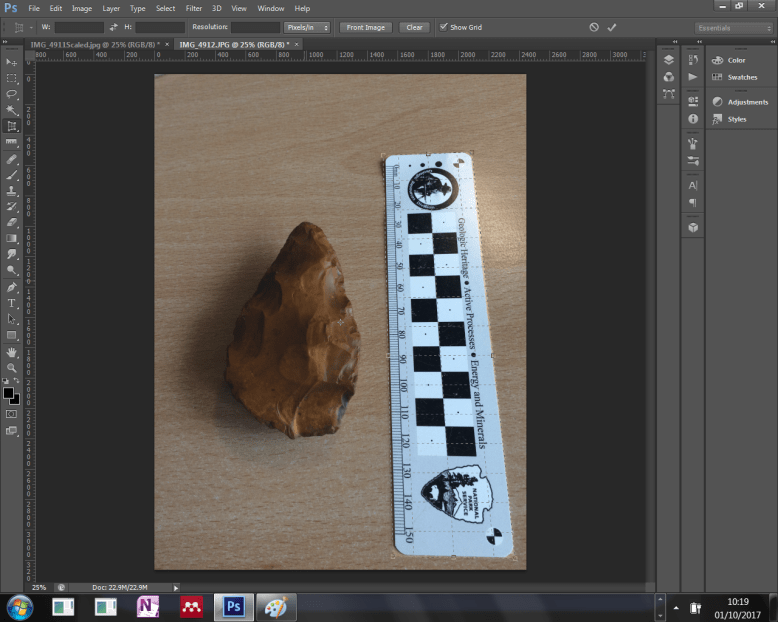 Figure 12: Drag the corners with the cursor so they are on the object of something you know to be square, in this case the scale bar.
 Figure 13: Extending the sides of the crop tool beyond the initial square.
 Figure 14: The final cropped and corrected image ready for measurements
